Showing posts with label vegetables. Show all posts

Tuesday, October 8, 2013

Curried Butternut Squash Soup - Theme


The cool weather is coming in - as are the Fall vegetables. Butternut and acorn squash instead of zucchini and pattypan, beets, carrots and  parsnips joining (not yet replacing) the peppers and tomatoes...

And hot soup is starting to sound like a good idea. This is soup and salad season - lunch bridging heat and cold, creamy smooth warm soup with crunchy colorful cool salad.

This is a vegan "creme" soup I've been making for a couple of years. I'd seen some recipes for using silk tofu to make a creamy soup, or a bisque, tried the idea out a bit, and liked it... and experimented with several variations. It gives the feeling of a cream soup, with less fat and no milk, and it is ridiculously easy, as long as you have a blender or food processor.

Silk tofu is a specific type of Japanese tofu. It is most readily available in the shelf stable aseptic packs from Mori-nu. The name is a reference to the smoothness of the tofu, unlike regular, sometimes called Cotton tofu in Japan. It does not refer to the curds being strained through silk, as I have sometimes read... indeed, the difference is that they are not strained at all, and the whey is part of the final product. This does mean that it has less protein per ounce than the regular.

If you can't get silk tofu, regular will work, but it will not be as smooth and luscious. Use soft, rather than firm, and blend very thoroughly.


First, I cooked my squash. Since I was making soup, and wanted the liquid, I simmered it. Take the squash, peel it with a swivel blade vegetable peeler, to remove just the tough part of the peel with as little waste as possible. Then cut it down at the bulbous end, and scoop out the seeds with a spoon. Cut the squash up into chunks, put in a large soup pot - bigger than you think you need -  cover with water, add a little salt if you wish,  and bring to a boil. Lower to a simmer, for about 15-20 minutes, until the vegetable is very soft.

Now - my directions are going to diverge... First, I'll tell you what I normally do. Then, I'll tell you what I really did this time - since a migraine hit while the squash was cooking, so I put it  away for another day... And both are useful options.

Normally... When the squash is cooked, uncover it and let it cool slightly. While it cools, chop a medium onion, and saute it in a little olive oil. When it is soft, add 2 teaspoons of curry powder - more if you like it. The tofu blands out flavor, so you will want more than you usually do - but it's easier to add than to remove... Stir the curry powder with the onions over the heat for just a minute - the heat helps bring out the flavor.

Now, scrape the pan into the soup pot. Swirl a  little of the squash cooking liquid in the fry pan to make sure you get all the onion and spice.

Open a 12 ounce aseptic pack of tofu and put the tofu into the soup pot. It's best to break it up into chunks at this point. (If you can actually get fresh silk tofu - available at Japanese stores, and very occasionally elsewhere, you can use it - you want about 12 ounces. 14 works.  If the package is larger, but so is your squash, go for it...)  Then take an immersion blender - sometimes called a stick blender - and use it to puree the squash, cooking liquid, onion mix, and tofu until smooth. Stand back a bit - it will splatter slightly, and it's still hot... (This is the reason I suggest a large pot!) If you do not have an immersion blender, definitely cool it first, and then put it, in smaller batches, in a regular blender. You shouldn't blend a hot mixture - hot liquid has been known to shoot out of blenders and scald cooks - let's not go there... It will be quite thick, and you may want/need to add liquid (especially if it is in a traditional blender.) This can be plain water, soy milk, or broth.

Now reheat the soup to serving temperature. It's a great make ahead dish for a nice dinner - do everything before now when convenient, then heat just before serving... Taste, and add more curry powder if you like. Remember, not only tastes vary - so do curry powders! Some are much hotter than others...  I sprinkled just a little on top as a garnish, too...

Now - What I Really Did...


It all started the same - but as the squash was just about cooked, the migraine struck. I was actually cooking this in advance for the next night, so I just turned off the heat, lay down, and asked Rich to put the squash away in the fridge when it cooled.


The next day - I got the squash out. Instead of cooking an onion, I just used some of my handy frozen cooked onion (though that did mean I didn't heat the curry powder.) I put part of the squash, a chunk of onion, the tofu, the curry powder and some water in the blender. (Rich had drained the squash - I'd forgotten to tell him I wanted the cooking liquid in the soup.) Blended it until smooth - stopping the blender periodically to push the mixture down towards the blades, and adding more water. (Always stop the blender to push food down... just so many things can go wrong if you do not...) I poured most of that mixture into a pot, put the rest of the squash in the blender, and repeated the process. Mixed it all together in the pot, heated, adjusted spice (my new jar of Hot Curry Powder from a local grocery store is much milder than my old jar from the spice store. I needed to add a lot.) Served.


Now, this lends itself to variations. One fast one is - just follow the last paragraph, using two cans of pumpkin. (Or one can, and only half the tofu.) With shelf stable pumpkin and shelf stable tofu this can turn into a really useful whip together recipe for unplanned company.

Another variation is to change the spicing. I sometimes use pumpkin pie spice, or even just ginger. The taste is quite different, and equally good. And, of course, you can use any winter squash - acorn, carnival, hubbard, cheese pumpkin, whatever you have - they all taste just a little different. It can be a good use for leftover squash, if you baked a large one and need to use that Other Half... just be sure to add a lot of liquid.

It's not really a full meal soup - but great with lunch, or as a nice first course for dinner. It can really dress up a plain meal.

Curried Butternut Squash Soup

1 butternut squash
salt (opt.)
1 onion
olive oil to saute
2 t (or more, to taste) curry powder
1 12 oz. pkg. silk tofu
water, soy milk, or broth, as needed

Peel and cut squash, cover with water, add salt if desired, and cook until very soft. Let cool slightly.

While it cools, saute onion in oil. Add curry powder, stir around to heat, then add onion mix to soup pot. Add tofu to pot. Use an immersion blender to puree, adding water, broth, or soy milk to achieve the desired consistency.

Heat to serving temperature.

Tuesday, September 24, 2013

Ratatouille - or... Using Up Vegetables


I had eggplant. Oh, boy, I had eggplant..

So - ratatouille. It's a classic French dish from Provence, a stew of summer vegetables. Roughly equal amounts of eggplant, zucchini, and tomato, with onion, garlic and basil. Unlike most vegetables dishes, it's cooked until the vegetables are soft, and freezes (and reheats) beautifully.

And, well - we've been getting eggplant every week, and it's getting ahead of me.

I also had a couple of zucchini - bigger than I usually like, though still pretty tender. (I don't know how our farmer does it - we get big squash that haven't gone to seed... Choice of cultivar, I assume, but I'm not used to seeing it elsewhere.) And I had some tomatoes, though not really quite enough for the traditional proportions.  (Yes - I know the home gardener usually has Too Much Zucchini. Our farmer is careful not to overwhelm us with it... and I can use a lot of it anyway, as it cooks so easily. The same concepts apply, though.)

First, let me address the tomatoes. I had several choices of how I wanted to deal with that. I could, of course, just make something else. I could make a small amount of ratatouille, using the tomatoes I had, but less of the eggplant and squash than I wanted to. I could go out and buy more tomatoes, or use a can of diced tomatoes.  I could go ahead and make it with the "wrong" proportions, and either eat it or freeze it as such.

My choice was going to be dictated by my goal. If I were, for example, cooking it for a dinner party and trying to impress someone with my cooking, I'd definitely either change what I planned, or go buy tomatoes. In this case, though, the goal was to do something with all those eggplant, and maybe work down the squash, too, because this is the time of year when the CSA gets ahead of me, and I may get more vegetables than I can use that week. I like, though, to have some prepared vegetables in the freezer, for winter, or just for busy days.

I decided, therefore, to just go ahead and cook it as it was, freeze it all,  and add a note that I might want to add tomatoes...  which, then, I may or may not do. I can get good quality diced canned tomatoes, so that's an easy option, down the road - and, in fact, this saves me freezer space.

First, I chopped a large onion, and a big clove of garlic, and sauteed them in olive oil. I was a bit more generous with the oil than usual, as that's a traditional ingredient of ratatouille and adds richness, and I was going to want enough for the rest of the vegetables, too. I cooked them until they were just starting to soften.


Meanwhile, I cut the eggplant into big chunks. I added them to the pot, and tossed them with the onions and oil. Did the same with the zucchini. Then I chopped the tomatoes and added them. I didn't bother peeling them - we don't mind a little tomato skin in our food.

You sometimes also see directions to press out all the liquid and seeds. There are a couple of problems with that... First, the gel around the seeds has a lot of the flavor, so you'd be losing that. And, in this case, I want to have some liquid to start this - as the other vegetables cook, they will release plenty of moisture, but I want a bit of liquid in the bottom of the pan to start it. (And - well - I tend to leave out the fussier steps - but that's a  matter of individual taste. They're not worth it to me - they might be to you.)


A glance at the picture will tell you that I had less than half as much tomato as I did eggplant. But that's OK... While I was working on this post, I was talking to a friend about the ratatouille she was making - she didn't know I was working on this, but we all have eggplant, it's that time of year - and she was talking about red and green peppers. Peppers? I've eaten it with peppers, but also without, and I'm not sure I ever cooked it with peppers...
.
I hauled out the Larousse Gastronomique I recently inherited - the arbiter of French Cooking...  Yes, peppers... (though it doesn't specify red or green.) But I've certainly eaten it, prepared by others, without peppers... and I've always... wait... I've always cooked it without peppers, but I've made this since I was in my late teens or early 20s, and was still at my parents' house much of the time. And my mother was allergic to bell peppers, which means that I have absolutely no idea whether or not the first recipe I followed included peppers - I would have left them out reflexively.
                                                                     
A key to this sort of adaptation is understanding the major flavors of the dish. The keynote, as it were, of ratatouille is eggplant, with zucchini and tomatoes as the secondary layers. (I've always heard it described as an eggplant recipe, with Summer Vegetables coming second - never as just a zucchini recipe...) Onions, bell pepper, garlic, herbs are all grace notes. They add to the flavor, but they are not central. So I could make a delicious stew with zucchini, tomatoes, and peppers - but it would not be a ratatouille. This is - but just barely... it really should have a little more tomato to *properly* be that classic dish.  So, I may serve it as is, or I may add a can of diced tomatoes - it will depend on how and when I use it.

Anyhow, I tossed all the vegetables in the pot, to coat them with the oil, and mix them thoroughly. Then I put a lid on, set the heat very low, and let it all simmer about 15 minutes. When I came back, the vegetables had started to shrink, and liquid was cooking out of them. I stirred them some more, and continued to simmer them, over low heat, without the cover. Oh, and I added about 2 teaspoons of crushed dried basil.

 Normally, I prefer zucchini just lightly cooked, still firm, not mushy. Eggplant, though, needs to be cooked soft... and this medley works best if the texture is all the same. So, I continued simmering it until all the vegetables were soft, and the flavor had melded - and most the liquid had cooked off. If I were serving it immediately, I might have left it moister, but I didn't want to give freezer space to water, and, if I add tomatoes later, I'll be adding their liquid... I cooked it about half an hour, all together.

I let it cool, then, and packed it simply in take out containers. I'm not actually going to keep this long - I'll make another batch and freeze it in freezer containers, which let in less air and take less space in the freezer. This will just be prepared food for times I can't cook.


Ratatouille

One large onion, chopped
1 large clove of garlic, minced
2 T olive oil
3 medium eggplant (or one large one)
2 medium zucchini
4 (or more) tomatoes (Ideally, classically, the eggplant, zucchini, and tomatoes should be roughly equal by weight.)
2 t dried basil

Saute onion and garlic in oil until starting to soften.

Chop eggplant and zucchini into bite sized pieces. Add to the pan, and stir to coat with oil.

Chop tomatoes, add, with liquid, to pan. Stir and cover. Let simmer, covered, 15 minutes, stirring occasionally.

Remove cover. Add basil. There will probably be a good bit of liquid in the pan. Let simmer without the cover until it has cooked off a little, and vegetables are done to your taste - probably another 5-10 minutes.


Saturday, September 21, 2013

Sweet and Sour Red Cabbage

Autumn is here!

Well - the Autumnal Equinox is actually tomorrow... but close enough. The season has changed... The weather started fluctuating between cool and hot a few weeks ago, but, this week, the warm spell following the cool weather was in the seventies, not the nineties. We called this weather cool a month ago - now, we think of it as warm. It's Fall...

Fall in New York City is wonderful. The air is crisp and clear, the sky turns a remarkably deep blue, with little wispy clouds drifting (or racing, often) through the air. The sun is warm and the air is cool, and it's perfect walking weather.

And it is the height of the harvest season. I'm still inundated with eggplant and tomatoes - but the winter squash is starting to come in, and cabbage, broccoli, and glorious crisp apples... And we start to be in the mood for a less summery meal.


The other day, I cooked a sweet and sour red cabbage, and added shredded pork. Served it with mashed potatoes, and it was just right for a cool evening! And it is another variation of the basic Sauteed Vegetables.

Since I was using pork anyhow, I decided to use bacon to saute the onion. I don't eat it alone very much, but I do like to use a little in cooking, sometimes - it can add a lot to a simple meal. I am able to buy "bacon ends" which is fine for me, as I'm not looking for the strips anyway. I loosen them up, and freeze the whole package - then cut off just what I need. I can easily cut it with a sharp, fairly heavy knife. Then I dice it small, and put the dice in a heavy pan over low heat so the fat will render out, and I get crisp bacon bits. (This means... the fat gradually melts, so you have liquid fat, and crisp bits. Use a low heat so it doesn't burn.) You can drain off some of the fat, if there is too much - I just use a small amount to begin with, and keep it, since I'm after the flavor. If you would rather not use bacon, just heat some olive oil.


Then I chopped a red onion, and added it to the bacon and grease. I used red largely because I had it... but also because it's a bit sweeter, and I was going for the sweet and sour taste. And, of course, the red onion is pretty with the red cabbage. I stirred it around every so often, as the onion started to soften.

I don't seem to have taken a picture of chopping the cabbage... this cooking and picture taking at the same time means I sometimes get distracted... A whole cabbage is almost always much more than I want to cook at once, for two people - so I cut off a big chunk from one end, and work with that. The rest goes back in the crisper - when I next want it, I cut a paper thin layer off the cut edge, discard it, and the rest is good to go. Meanwhile, I place my chunk on the cutting board, and slice it, so the cabbage falls in shreds. If I get to the core, I cut it out, and discard it. I may then cut the shreds in half, to make them easier to eat.

I put the cabbage shreds in the pan, with the bacon and onion, and stirred it around a lot to distribute the bacon grease over as much of the cabbage as possible. I let it wilt a few minutes, then added just a splash of apple cider vinegar, for the Sour. Then I cored and chopped one of the lovely new apples (I left the skin on, but discarded core and seeds) and added it, for the Sweet. (Rich wandered into the kitchen, and said "You know, an apple would be really good in...  oh ... that's an apple core, isn't it?" Two great minds in the same rut, as my father used to say...)

I covered the pan, to hold in the steam and speed up the initial cooking, then checked it after about 5 minutes.

Usually I would just cook and serve this as is, as an accompaniment to pork chops or something. In this case, I had some pork left from a pork shoulder I'd cooked. I decided that, instead of just heating and serving it plain, or trying to figure out some way to season it, I'd just throw it in the cabbage mixture. This is, of course, purely optional - but it made this meal simpler. I just put the frozen block down in the fridge a few hours earlier, and then dropped it into the cabbage. I covered the pan again, briefly, until the meat thawed (I wouldn't have, if it hadn't been still partially frozen) and stirred it in. I then let it cook until cooked to our taste.

I served it with mashed potatoes - which I'll talk about another time - but plain boiled ones would have been great. If I'd felt really energetic, potato pancakes would have been delicious - I might do that for guests, or a special occasion meal. Pork roast, probably, in that case, the cabbage, and potato pancakes... very fancy in a Good Home Cooking way...

Sweet and Sour Red Cabbage

1 strip bacon, diced small (or substitute olive oil)
1 red onion, chopped
2 cups shredded red cabbage
1 oz cider vinegar
1 apple, cored and chopped

1/2 pound shredded cooked pork, opt.

Put finely diced bacon in a heavy pan over low heat, and cook until the fat renders out and the bacon starts to crisp. (Or, if you aren't using bacon, just heat some olive oil in the pan.) Add the onion, stir, and let cook until onion starts to soften.

Add the cabbage. Stir it around thoroughly, to coat it with the fat, and let it start to wilt slightly. Add the vinegar and the apple, stir, and cover. Remove the lid after about five minutes, then stir and cook until done to your taste.

If you wish to add the meat, do so after removing the lid. Stir in, and heat through.


Tuesday, September 3, 2013

Grilled Summer Vegetables - Pretty Little Eggplant...


We got the cutest little eggplants from the CSA... 


I don't normally go all ecstatic over Cute - but really, aren't these adorable? Delicate, tiny little things, streaked with lavender, almost too pretty to eat.

I couldn't see just simmering them into a sauce, or mushing them up into baba ganoush or some other spread. They had to stay intact. So I decided to grill them.

I also had a patty pan squash. The other day, I wrote that I haven't really found an attractive way to cut them - but then I'd thought of slicing them to preserve the flower shape, and grilling the slices. Put the ideas together - and I had this leek I'd already trimmed (so it would fit in the vegetable keeper...) and I had a dinner concept.

I washed the eggplants, and cut them lengthwise, to preserve the shape. Then I sliced the squash horizontally, so I had flower shaped discs. I could, of course, use the same treatment on any slices of eggplant or summer squash - I have, in the past. It's particularly good, though, for preserving the appearance of an attractive vegetable.

I sliced the leek lengthwise, too. I'll go into this in more detail another time - but leeks should always be slit up the middle. The way the farmer gets the nice long white part is to hill sand up around the growing plant (a process called blanching.) Since they are grown buried in sand, they get sand inside the plant, and it is almost impossible to wash all the grit out leaving the layers intact. Usually, I slit them up the middle and then slice them, but you can also, as I did here, slit them while leaving the root end intact, and then wash thoroughly under running water, to get all the grit out from inside the leek. (You can see the sand and grit in this picture... that is normal,  but it did all wash out.)


I find that grilled vegetables, even on a grill pan (rather than an outside grill, which I do not have) cook better with just a little oil brushed over them. In this case, I put a splash of olive oil in a bowl, and then added just a drizzle of sesame oil for flavor.

I used an open pan - this could also be done with one of the closed grill pans - George Foreman is well known, but Cuisinart has one, also, and there are others. The vegetables will cook more quickly in one of them, partly because heat is being applied to both sides, and partly because the natural steam is being held in to some degree - an advantage with the vegetables. The disadvantage to them, though, is that bigger pieces hold the top up, so it doesn't touch the thinner or smaller pieces. They work best when all slices of food are the same thickness, which was not the case here. (If you don't have a grill of any kind, you can do this in any good skillet - the whole side will brown nicely, instead of giving you pretty grill marks, but that doesn't make a serious difference.)

Anyhow, I used a pastry brush, and lightly  brushed one side of the vegetables with the oil mix, then put them oiled side down, on a preheated pan. I wanted the pan to be hot when the veg first hit it - that's what gives you the nice browning effect. Then I brushed the side facing up with oil, so it would be ready when I flipped it over.

Unfortunately, as they cooked, the eggplants did lose the pretty lavender color... oh, well. They made up for that by attaining the pretty brown grill marks...  I watched them, and, as the individual vegetables showed signs of softening (and changing color) I turned them over with tongs.


I had more than fit on the pan, so, as they then cooked, I removed them to a platter, which I covered to keep them warm. I was cooking potatoes and leftover ham for the rest of the meal, so I microwaved the potatoes until mostly but not completely cooked, then sliced them and added them to the grill pan for browning. (In my microwave, that was 2 minutes for four small/medium potatoes, then turn them over and give them another 2 minutes. I find that timing varies considerable by oven, though - that would have taken a minute or two longer in my previous one.) Meanwhile, I heated the ham in a fry pan, until it, too, browned.


Notes for future - the leek was basically cooked, but a little bit chewy, still. Another time, I might start it well before the more tender vegetables, or parboil it, or (more simply) microwave it a minute or two, as I did the potatoes, to, essentially, parboil it.

Also, Rich said he felt the ratio of skin to meat on the eggplants was a little high. Well... He suggested peeling them, and I suggested that he was welcome to peel a dozen tiny ones if he really wanted to, though I wasn't sure how much eggplant that would leave, and... The real issue was that, while the meat was tender, the peel was just slightly tougher - so parboiling might be an option for them, also. (I didn't mind it. OTOH, in general, he likes eggplant better than I do, so keeping him really liking it is worth something.)  Of course, if I were just grilling slices of larger eggplant, which would be more common, none of that would be relevant. On the whole, we did like it, and felt it came out well, as an experiment.

The other thing we were experimenting with was taking pictures. I do want to improve them, and Rich is the photographer in the house. So he hauled out a tripod, so we could try available light, instead of flash... and you see the results. (Now we're working on another light source...)

Meanwhile, though - this is a *tiny* kitchen. The building was built in the late Forties, as part of the G.I. housing rush, at the height of the fascination with the inefficient Efficiency Kitchen. Two people cannot work together in this kitchen. (Two people can barely stand together in this kitchen!) So, there we were - him and me and the tripod, with not really enough room for any two of the above, when the Big Cat (all 20 pounds of him) decided to join us, and stretched out smack in the middle. So helpful... He's going to Inhabit that Kitchen, all right!


Grilled Summer Vegetables

Assorted vegetables - eggplant, summer squash, leeks, onions, potatoes, whatever is on hand, and suits your taste.
1 T olive oil
1/2 tsp sesame oil


Wash vegetables, and slice into appropriate shapes. If desired, microwave or parboil tougher vegetables, until barely cooked, so they cook in much the same time as the more tender ones.

Heat grill pan. Mix the oils in a bowl. Use a pastry or basting brush to brush the oil very lightly on one side of the vegetables. Place the vegetables on the hot pan, oiled side down. Brush the other side with oil.

As each piece cooks (determine by color and tenderness) turn it over. If you need more than one batch, removed cooked pieces to a platter, and cover lightly with a clean towel, to keep warm.

Saturday, August 31, 2013

Vegetables From Space!!!

Some vegetables just look so... Cool. Or do I mean weird? Kind of a great still life, but... does anyone really know how to cook them? Or even what they are?


And are we sure they're not some alien life form? All right - I'm going to date myself, here - child of the Sixties that I am, that picture looks to me as if those things landed from outer space to sit on my dish towel. (Though they're a bit more colorful than most pictures of UFOs I remember seeing... let alone real space capsules.)

The Flying Saucer - on the left - is a patty pan squash. It's a regular summer squash, just like zucchini, or crookneck. Just cut it up and cook it the same way. No, I do not have pictures of a suggested way to cut it - I've never found a way I was particularly pleased with - just hack it into chunks.

If you get some that are small enough, they can be cooked whole, and that's really attractive. I was even served them as an appetizer at a very nice wedding, once! Specialty stores do sometimes sell baby squash (at a premium, of course) for the purpose. I have not had luck with cooking a standard one whole - the outside seems to get soggy before the middle is done. One of these days, I'll experiment with stuffing one, as people stuff large zucchini, but I've never really stuffed vegetables much, so don't have anything yet. I can see it being a very nice presentation, though...

Sputnik, on the right (no, I don't actually remember Sputnik, but it was part of the general culture of my childhood) is a kohlrabi. Actually, the stems have been snapped off this one - the resemblance is much stronger when it still has stems sticking out at all angles! And they come in purple, too - one of the farmers here had piles of green and purple ones all winter.


(Ah - here's a purple Sputnik...)

Five years ago, I'd heard the word Kohlrabi, but could no more have told you how to cook it than, in fact, how to build Sputnik. I was walking past them at Greenmarket... and then I got some, at the CSA. Time to learn.

Well, I was missing out.

It's almost two different vegetables. Now, in Summer, the kohlrabi I'm getting are young and tender, crisp and juicy, and I cut them up raw for salads. They have a very slight bite - much less than a radish, but enough to be interesting, and they are very pleasantly crunchy. As the year goes on, though (and as we move out of salad season... see, it works...) they become harder and more fibrous, and need cooking. A light saute at first, and then, in winter, I simmer them as I would a carrot.

Even the young, tender ones need to be peeled, though. I'm normally all for scrubbing vegetables instead of peeling them, as so much of the nutrition lies in or just under the skin, but some peels are just inedible, and this is one.

I can't even use my swivel peeler for a paper thin paring... this peel is thick and tough and fibery, and if it gets into your dish, you find yourself spitting out stringy bits - very unpleasant. Luckily, once you cut it, the peel is quite visible - no guesswork needed. It is a darker color, and the tender center is very pale. (And the purple ones are only purple in the peel - the middle is very pale green.)


Once I peel them, I just cut them in cubes or rectangles - again, rather like carrot sticks. Right now, the texture is more like a very juicy radish, so I want them bite sized for my salads - not a thin slice, but enough to crunch. A half moon shape would be fun, too, if you have some small enough.


What vegetable have you seen at the market (or gotten at the CSA!) that intimidates you? Or that you just don't have a clue about... what is it, how do you cook it, will you even like it???

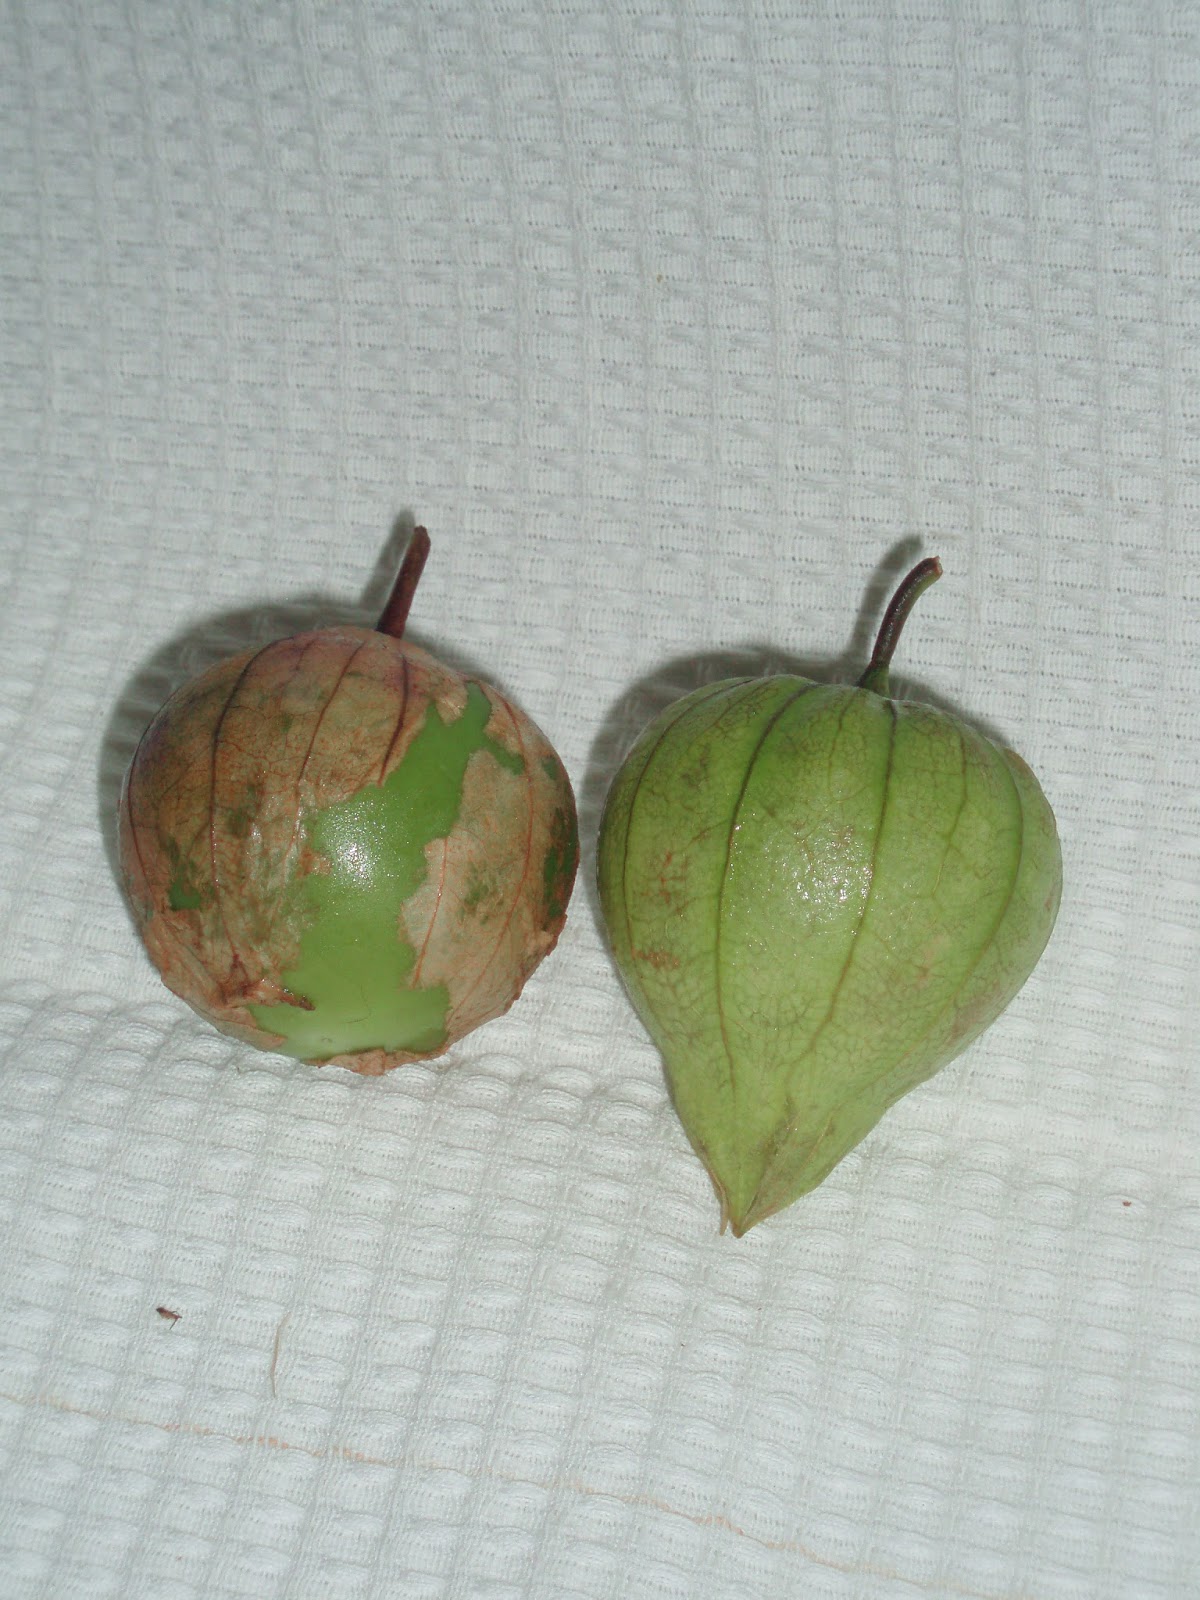
I now must go forth and venture where, well, where *I* have never gone before, though many fine cooks have... the tomatillo. I just saw an intriguing recipe on another blog - Not Eating Out in NY . It is, logically, perfectly seasonal here - but I'll probably tweak it... my CSA doesn't give me many beans.  (Eggplant, now... I wonder what it would be like with eggplant...) But, for the first time, I feel I can make something other than salsa verde.

Adventures in vegetables!

Saturday, August 24, 2013

Theme: Chicken Vegetable Soup

It's August in New York City. It's hot, and humid, and sticky, and miserable, and... 60 degrees??

Well, every few years, in the middle of our proverbial dog days of Summer, we get just a few days of Fall weather, just to  tease us, before the weather returns to the usual oven. It's a wonderful respite, and really helps for the rest of the summer, too, as the concrete and brick cools off and stops radiating heat at us. You can't count on it, it won't last, but... it is lovely...

Well, we had a few days like that last week. And I had a container of chicken stock in the freezer, and some cooked chicken,  and some odds and ends of both raw and cooked vegetables - and I thought a bowl of a light soup would be a nice addition to lunch.

I looked in the fridge, and assembled my ingredients. Half an onion, half a celery stalk, half a carrot (remember, I'm cooking for two. Sometimes a whole onion or carrot is just too much...) Chicken, and chicken stock. Leftover greens, frozen in cubes.


What? Well... with two of us, a whole bunch of kale or chard is usually too much for one meal, especially as I often serve other vegetables as well. So we freeze the leftovers. My favorite trick, actually, is to freeze them in muffin pans - that gives me little half cup muffins of greens... little manageable chunks. This time, the freezer had been full, though, and we really had some tiny bits,  so Rich (he cleans up, since I cook) put them away in little ice cube holders. (They were my grandmother's - they're useful for all sorts of odd little bits of things... but if you don't have them there are many small containers you can use.) I usually pop them out into a zippered freezer bag the next day, and assemble a bag of muffins and cubes of various cooked greens. They're useful when we carry a meal, they're my go to for  Anne Can't Cook nights, and they're a great size to toss into other dishes.

So, anyway... I got everything together, and put a pot over heat. The chicken fat (there wasn't much) had risen to the top of the stock. I used a spoon to scrape off some of it, and put it in the pan to saute the vegetables. You can scrape all of it off, if you want, and, if there had been a lot of it, I'd have discarded some, but a lot of the flavor is in that fat. It makes more sense to me to just use some of it, instead of adding oil. If I were using packaged stock, which is usually lower in fat, I'd just grease the pan with olive oil.

I chopped the onion, celery, and carrot (Aromatics,  remember?) and put them in the pot. Let them saute just a little, while I chopped the frozen greens. This is one feature I really like about the cubes and muffins rather than one thick chunk - I find them easy to chop more finely, which I want if I add them to soup or a sauce. Let's avoid long strings of kale dripping out of spoons, shall we? They get messy... Then I added the greens to the pot.


Anyhow, when the aromatics had softened a little I popped in the chunk of frozen stock. As it was thawing, I knew I would need more than a pint of broth, and I wanted it to have plenty of flavor, so I crumbled and threw in some dried shitake mushrooms. We're lucky enough to be able to shop in Japanese stores where they are inexpensive, we love mushrooms, and they are very useful for quickly adding some flavor to a broth or sauce. Soup base or seasonings would also be an option here (or just a larger container of stock, if you have one...) Since I was using mushrooms, and not a seasoned soup base, I also added a dash of salt.


While the frozen broth continued to melt, I chopped a piece of the cooked chicken. The soup wasn't going to be a whole meal, so I just put in a little - for flavor, as much as anything else. I added it, then, when the broth was mostly melted, added about a cup of water.


Then I just put on a lid, left it on medium heat until it all simmered about 5 to 10 minutes and all the vegetables were tender, and called it soup.


This kind of soup is a great way to fill out a meal. I use it as part of lunch, as I did here - but it is also a way to get a bit more vegetable, or meat, or... whatever... into a meal that is light on that food group. (I didn't add a grain or bean, this time - but that's easy...)  Or - there is *almost* but not *quite* enough of that casserole left for dinner... or "Of course you can come over!" Or, most often, probably, just that you want to Do Something with those bits and pieces without it feeling like leftovers.

Now, the point of this is to let you cook without a recipe - but I know that, for beginners, it can be easier to have a written out recipe. So I'm adding that, here - and I'm doubling it, instead of actually *calling for* those half pieces of vegetables... but, remember - that's what you can  use...


Recipe - Chicken Vegetable Soup

1 onion
1 carrot
1 rib celery
olive oil (opt.)
1 c cooked greens (any assortment - kale, chard, spinach, beet greens - whatever you have on hand)
1 qt. chicken stock or broth
4 dried shitake mushrooms (or 1 t soup base)
salt, to taste
6 oz cooked chicken

Chop onion, carrots and celery.

Grease the pan with either the fat from homemade stock, or olive oil. Saute the aromatics for a few minutes, until they start to soften.

Chop the greens finely, add them to the pot.

Add stock, and mushrooms or soup base (breaking the mushrooms up into small pieces.) Add another 2 cups of water.

Chop chicken into small chunks, and add to pot.

Let simmer about 10 minutes, until all vegetables are softened and flavor is blended.

Tuesday, August 20, 2013

Variation on a Theme: New York Collards


I wrote about the way I generally cook greens.  I like spinach, chard, beet greens, even mustard greens and kale cooked with the light saute and barely simmer method.

You may (or may not...) have noticed that I didn't mention collard greens...

I didn't grow up eating collard greens. My mother, somewhat unusually among people we knew,  did cook beet greens in the country (when she could get them,) so I did always know how good they were - but pot greens in general, and collards especially just weren't on  the middle class Manhattan Irish radar. I started buying them from farmer's markets as a young woman, but I cooked them the same way I cooked other greens - and didn't like them. They always were tough and unpleasant... and it took me - well, let's be honest - it took me *years* to accept that the problem was my cooking method. Maybe all those Southerners who boil them were onto something...

So, I started asking around. There seemed a wide variety of precise recipes and methods, but there were constants. Start the same way I do, with sauteing washed greens in  a pan, but perhaps use just a little more fat - enough to be sure all the chopped leaves do wilt in it. And most recipes made it something with flavor - bacon or some such - or added other flavorful meat to the pan - smoked pork or turkey, for example. The big difference, though, comes now - add liquid, usually broth, and simmer for a good while - perhaps half an hour, on a very low flame. And many people then serve them with some sort of hot sauce.

Well, I tried that, and it was certainly an improvement. So I've cooked them like that for several years. But... I don't usually have smoked pork in the house... and... well...

I had hot Italian sausage.  It's a flavorful pork product, it contains fat that cooks out, it even had the pepper built in... I couldn't see any reason that wouldn't work...


I cut up the sausage, and dropped it into my heated pan. Then I chopped an onion, and stirred it in, as enough fat cooked out of the sausage so that the onion wouldn't stick, and could brown. Stirred them both around, as the meat and onion browned.

While they cooked, I washed and chopped my collards, as I did in the Basic Greens. The one major difference is that I do always remove the stems of collards - they're just too tough and stringy.  I didn't have to let as much of the water drip off as I do using the other method - after all, I was going to be simmering them - but I did want most of it off. Then, when they were no longer actively dripping, and the meat and onion were browned, I dumped the collards in the pan. I used the tongs to stir them around very thoroughly. As the collards touch the hot fat, they turn a bright green - very attractive looking. I kept stirring until all the chopped leaves were bright green and slightly wilted. (in the picture, you can see some bright and wilted, and some, at the edges, that are still fully raw.)


Then I added water, heated it up, and let the whole thing simmer. As the greens cook, the color darkens. My goal is to let them simmer (and darken) until tender, but catch them just before they turn a dull olive green, which is overcooked, to my taste. That's fairly personal, though - many people like them that soft. I find it usually takes a bit under half an hour - I check regularly after about 20 minutes.I know that some people do cook them as long as an hour, though.

Then you eat that delicious cooking liquid, as well as the greens.  That's the traditional "pot likker" sopped up with bread or served over potatoes and grits - or rice, in my case, or pasta, or...


Recipe:

1/2 pound hot Italian sausage
1 small onion
olive oil (opt., as needed)
I bunch collard greens, chopped and washed, stems removed

Cut up the sausage and the onion.

Brown the sausage in a large fry pan or saute pan, until fat cooks out. (Depending on your source for sausage - if there isn't enough fat to fully grease the pan, add a little olive oil now.) Add the onion, stir to mix with the meat, and saute over low to medium heat until the meat is browned and the onion starts to turn golden.

Add collards. Stir around with the sausage mixture until coated with fat, and let cook, stirring often, until the leaves are a bright green. Add about a cup of water. Bring to a simmer, and let simmer, stirring occasionally, for about half an hour, until cooked to taste.

Tuesday, August 13, 2013

Summer Saute - Theme


Sometimes a meal just tastes like a season, to me...

We have corn, now, and zucchini... We have the first tomatoes, now, and are glorying in them raw in salad, but I'm not cooking them, yet. That comes later, with abundance.


I get most of my vegetables from the CSA, but I stop at Greenmarket to buy fruit, and occasionally fill in something specific I need. Last week, one of the farmers had beautiful shallots - at the same price as yellow onions! So I bought some.

When I started to cook, I chopped a few shallots and dropped them into my prepared pan.  My what?

I put a frying pan or saute pan over medium heat, and let it heat for a minute or two, while I chop my onion/garlic/shallots. Then I pour in a very small amount of olive oil, and rotate the pan - the heated pan warms the oil and lets it spread all over the pan quite easily, so there is a film of oil covering the surface. I really use a teaspoon or even less... even in multi-ply stainless steel or cast iron.

Then I add the aromatics. That's a handy phrase for a variety of vegetables used, in this context, mostly for flavoring. Onions and garlic, other aliums such as shallots, or leeks, but also peppers (either sweet or hot,) celery, sometimes finely diced carrot... Which ones you choose strongly affect the flavor of the finished dish - enough that simply varying them can change a whole meal.

I've mentioned combining flavors in traditional ways. The choice of aromatics is so traditional that it has names in several cultures. French mirepoix is onion, carrots, and celery. The sofrito I've heard about from neighbors was onion, garlic, and hot pepper - but I gather that varies widely in different Caribbean cultures, and is different still back in Spain. The Cajun combination (sometimes referred to as the Holy Trinity) is onion, garlic and green pepper. And, of course, you can use your own selection, dictated by family tradition, desired taste on the day, mood, or simply what you have on hand. (The latter, of course, is a major influence on all the traditional mixtures - we're fortunate enough to have choices.)

So, anyhow, I cook the aromatics, usually just until soft. (And, in this case, I only used the shallots, not a mixture.) Then I add the rest of the vegetables.


I had zucchini from the CSA.

This is a Japanese cutting technique called a roll cut. I learned it back when I was first cooking, and have used it routinely ever since for round vegetables like carrots and summer squash. It creates irregularly shaped chunks with a lot of surface area, and I find it allows the vegetable to cook very evenly. When I was a child, I didn't like zucchini, because it was often cooked to mush. This technique helps prevent parts becoming mushy before the  rest is soft.


Basically, you cut the vegetable at an angle, instead of slicing it. Then you roll it slightly, so the knife, held at the same angle, is now cutting the vegetable at a different angle. This gives you oddly shaped chunks, with a great deal of surface.

And, of course, you can slice or cut your vegetables into cubes - it's your cooking, do whatever you and your family like!


I then added the zucchini to the hot pan with the onion. (This all took much less time to do than to explain...) I stirred it around, and let it cook.


The abundance of summer... corn... We've had corn on the cob, but sometimes we have a single ear, sometimes I can't use it for a day or two (so even supersweet isn't at its peak,) sometimes I just want it off the cob... And it is (not surprisingly) a wonderful combination with the other midsummer vegetables.

In this case, I took an ear of corn, microwaved it just three minutes, and let it cool a little still in the husk. I then cut off the kernels. You can, of course, cut it raw, but I've found that cooking it slightly makes them easier to cut (without getting them all over your kitchen...) I added the corn to the pan with the now softened zucchini, and scraped the ear to get all the germ and milk.


The corn was already mostly cooked, so I stirred it around until everything was heated through, and cooked to our taste.

Then I served it with small boiled new potatoes, and a piece of roast chicken. The perfect summer meal!


Summer Saute

olive oil for pan
4 shallots
2 small zucchini
1 ear of corn, slightly cooked if desired,

Heat the pan over medium heat while chopping shallots. Oil the pan, add shallots. Stir.

Cut up zucchini. Add to pan. Stir.

Cut corn kernels from cob. Add corn to pan when zucchini and shallots are almost cooked to your taste. Stir.

Cook until all vegetables are cooked to your taste - usually just another few minutes.

Friday, August 2, 2013

Corn on the cob - in the microwave?!


I grew up eating fresh corn only when we went to my grandmother's in the country. That was dairy country - Central New York - and all the farmers grew huge fields of field corn, as well as hay, as winter fodder for their cows. And around the cornfields, they would plant a row or two of sweet corn, for their own use, and for sale. The stalks weren't as tall, they ripened a little earlier, and every August, you'd see stands selling them. We could buy it from the grocery store in the little village, we could buy it from the farm stand where we bought most of our vegetables - but you'd also see, at the edge of the road along a field,  an overturned crate with a bushel of corn and a handwritten sign - "Sweet corn - $1/dozen." (Yes, this was when I was a girl - it's higher, now.) You left your dollar in the mason jar next to the bushel basket,  picked out your dozen, rushed them home and  into the fridge, and ate them that night.

Granny had a big old pot - I think she may have used it for canning when she was younger. We would fill it with water, put it on to boil, and my brother and I would shuck the dozen ears, right before cooking them. There were five of us, so we'd cook five ears at a time, for about five minutes at a time, putting the second batch in when we pulled out the first, and usually he and I got the extra two... We never ate corn unless we knew it had been picked that day - and usually went to the farm stand, where we knew it hadn't been sitting in the sun. Even a few hours made a difference in sweetness, as the natural sugar in the corn turned to starch.

Enter the new supersweet corn varieties. They don't turn to starch as quickly as the old cultivars, but still have good flavor. I still don't buy them in a supermarket, but if I can't eat them the very day I get them from the farm market or CSA, they're still good - and that day, they're sweeter than the ears that sat out in the sun in those bushel baskets, when I was a girl.

I have bought corn at Greenmarket, or eaten it from the CSA. I shucked it right before cooking, as I'd been taught (Don't ever remove the husks when you buy them - they help keep it fresh!) and boiled it in my soup pot - two ears at a time, for just two of us, now.

Then,, we were visiting Rich's parents, and they had corn bought at the supermarket. (I was polite, but not hopeful...)  I offered to shuck it, but his mom said no - she was cooking it in the microwave. (Now I was really skeptical...)

Well - I was wrong. It was astonishingly good, and quite easy. And I said "Please, ma'am, teach me!"

Basically, I leave the ear in the husk, and the steam generated from the kernels itself cooks the corn. I don't need to cook the cob, after all, just the kernels themselves. This method doesn't lose any flavor to the cooking water, it means I don't have to boil a large pot of water in midsummer, the steamed silk comes off easily. Removing the hot husks is a bit tricky - though I cheat - I get Rich to do that...


I take each individual ear of corn. If I bought it from Greenmarket, I will have pulled the end open a little, to make sure the ear has filled out - and that there are no bugs (left over caution from those bushels on the side of the road - I don't think I've ever found bugs in corn at Greenmarket.) For this method, though, I need to make sure I don't open it very far, and straighten it up, and close the end, as it has to hold the steam.

Then I use a heavy knife to trim the ends - cut off most of the stalk (but leave a bit for a handle) and much of the silk at the end. Again, though, I make sure the husk encloses the corn.


Now, the problem with microwave recipes is that the timing varies a great deal. Some microwaves have more power than others, cooking three ears will be totally different from cooking two, and so on. So, all I can tell you is what I do. I find that, in our current microwave, cooking two ears for five minutes seems about right. The first ears of the season - still milky,and so tender - I cooked about four and a half minutes. Corn I get late in the season (or an ear that has sat for a few days, if I have schedule problems) gets five and a half or even six, if I think it is getting starchy.

Then Rich takes over... That blue thing in the picture below is a silicone pot holder, which is the best choice for holding anything steamy, as it does not itself get soggy and scalding. He holds the ear with it in one hand (sorry - I forgot to get pictures...)  and, very carefully, pulls the husk back with the other, carefully avoiding the steam rushing out. The steam is really the only hard part, though, as the husk peels off much more easily than it does on a raw ear - it has been softened in the cooking. The silk also just mostly peels right off with the husk, and any left just comes off with a brief rub with a clean dishtowel.


This ear is a  butter and sugar or bicolored type, which I've always fancied - often thought to be less starchy, though I'm not sure I've really found a difference. Brings me back to childhood, though...

Butter, salt or a seasoned salt, freshly ground pepper... and I know that it is midsummer, and that, even in the heat of the city, that is a wonderful thing.


Edited to add: In the interests of giving credit where it is due...

Rich read this, and told me his mom learned the method from Microwave Gourmet by Barbara Kafka. (That's a link to one edition on Amazon, so you can see the book - it doesn't appear to be currently in print. They seem to have several editions, from several vendors. And no, that's not an affiliate link - I don't have an affiliation...)